LIVE UNIQUE...

PLEASE be respectful of the artist. Our souls are in our work. The art featured here is NOT to be exploited or copied. Each original piece is photographed from the experimental stages to the end product, sealed and copyrighted by dates. Reference to other artists are for the purposes of good publicity and customer discovery. They too make a living from their hearts. Please respect that and enjoy the content for what it is. Sharing and discovery of originality and beauty.
Showing posts with label easy. Show all posts

Sunday, January 20, 2013

Upcycled photo frame pin cushion project

Here's a cute little idea for old, tiny picture frames.  My mom had given me a box of stuff she was cleaning out of her craft room and inside were these little picture/mirrors things:


Cute right?  I suppose the lucky person would find these and the backs would easily pop right out so you can safely remove the glass without too much drama.  Me, I live for drama.  My backs were glued in.  So a little exacto knife carving, a little prying and a little swearing, I managed to...


Ahhhhh, break the mirror   Seven year's bad luck?  I think not.  I'm recycling.  And...I'm too awesome.  I repel bad luck. Stay strong and keep prying.  


Ta da!!!!  Now choose your fabric.  Not only am I recycling the old frame, but that fabric is left overs from another project somewhere out there.  


Sorry the picture quality is kind of meh.  It's like, 5:00 a.m. and I'm trying to do this in low light, all stealthy so as not to wake up the spawn.  

So anyway, you want to cut your fabric a little bigger than the back plate thingy.  This isn't an exact science.  Just follow the general shape of your backing thing and make it a little bigger.  


Start hot gluing it down following the edge of your fabric.  Pleat it with your fingers to keep it all even.  You want this to pouf out the front of the frame.
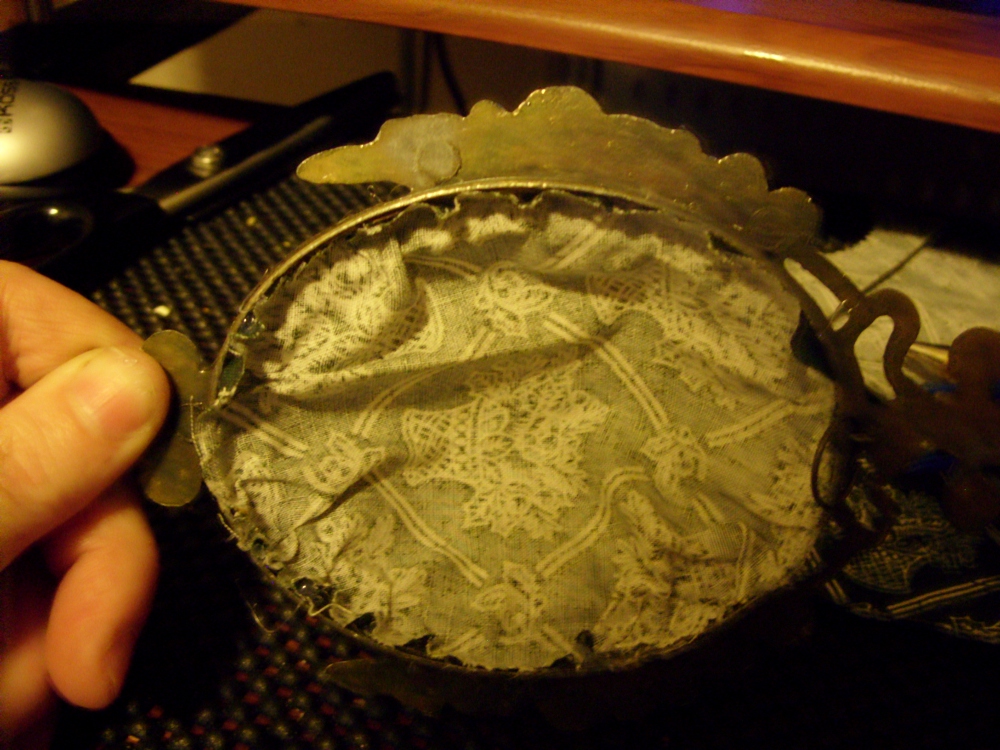

See?  Like this.  all glued.  
Now, your back plate thingy was not made to allow for fabric.  Usually these things consist of some kind of cardboard, so take your utility knife or scissors and carve it down a bit so its a little more frame friendly.

Your going to want to get some fiberfill.  You don't necessarily need to spend money on this either.  I like to visit the dump weekly and see what I can find.  An example would be leather chairs.  Always carry utility knives with you so you can harvest the free.  Within those leather chairs is an endless supply of perfectly usable and clean fiberfill.  WOO!

Pack that inside the fabric pocket while hot gluing the back thingy (I'm sure this is the official name for it).  Use a pencil or something to get the fiberfill under control while gluing in your back thingy.  

This is going to be under a little stress, with the fiberfill all packed in there, so run a bead of hot glue around the edge to neatly seal everything up.  
When your done, you have a cute pincushion.  I left the hanger thing (yet another official term) on the back so I could hang it up on the wall next to my sewing area.  


You can use any frame to do this.  I happened to like the antique look, so I kept it pretty original, but you can spray paint your frame or embellish it any way you want.   Have a friend who likes coffee?  Make one with coffee theme fabric and embellish with coffee buttons.  Sewer?  Wine drinker?  Pirate lover?  Trust me here, they have a fabric for that.  Go nuts. 


Sunday, November 15, 2009

A little holiday help

I thought as a little addition to my blog, a few helpful gift tips might help get you in the spirit this holiday season. If anyone knows how to get through this happiest, but stressful of seasons without spending too much, it would be me. I am a maker and a lot of the time the gifts that I give are made by myself, but that should not stop you from cutting costs without cutting the snaz this season. Here is a good example of a really easy and lovingly made gift:

Home made bread in a bag:

It sounds silly right? but coupled with a bottle of wine or maybe some home made dipping sauce, you have yourself a great gift here. If you can sew, all the better because then you can make the bread bag yourself. I go to the local Wal Mart and buy the fat quarters for $1.00 a piece. I choose 2 contrasting squares and whip up a simple bag. I use the scraps for sewing a simple draw string and voilĂ ! You have a bread bag your friend can reuse over and over again. You can also cut up that blouse that hasn't fit you in years, but has such pretty fabric-oh yes you can! In the age of new, new, new I am a HUGE advocate for a good recycle. It does not make the gift any less special, if anything it's even more.

Now, if you can't sew, do not despair. The local dollar stores have very pretty wine bags that work just as well. During the Christmas seasons they are very festive, though the choice in fabric are not my favorites (velvet and satin) so when you place your bread inside these bags, I would put your bread in a plastic bag first. I only suggest this because velvet and satin are not as easy to clean as cotton.

If your not too keen on that idea, I have another suggestion: Buy a nice big cotton dish towel from the dollar store. and wrap your bread gift on the diagonal. You can even decorate your plain white towel with fabric paint. Use your imagination! You only have 1$ invested so far!

As for the bread, there are a ton of wonderful bread recipes on line that are very doable. Pick something out of the norm and braid it into a pretty log before baking, shape it into a long baguette or keep it a round loaf. Whatever you do keep it out of a bread pan and keep it rustic and hand made. It will add to the charm of your gift.

So, you have your bread, wrapped in your tea towel or tucked into your bread bag. With a cute tag, that could be enough. Like I said though, I'm a maker and I would probably add some dipping sauce, either home made (again, the Google gods know all about home made) or you can buy some for only a couple of dollars from the store. Try to buy some in a glass bottle and if your not in love with the label, with some warm water, a razor blade and some Goo Gone, you can take it right off. Tie a bit of raffia around the top of your bottle with a pretty tag stating what it is and your gift is still sweet as pie. If you have a basket laying around, put everything in there on top of an extra tea towel or 2 and add a couple of tiny glass dipping bowels (again 4 for a $1.00 at the dollar sore) and the most you have just spent for this sweet gift is 5-$6.00. The recipient will LOVE it. She can reuse the towels, basket and bread bag so it will be the gift that keeps on giving.

And you thought you weren't crafty!!! Happy holidays!